Quickstart guide
This guide will help you create a new project, assuming that you have all the required programs installed and a correctly configured database connection with all the necessary extensions. If not, you can consult the sections installation-startup and creation-previous-connections.
Consejo
We recommend creating an example project first. This provides a reference that you can use when questions arise.
Creation of the database project schema
On a blank QGIS project, we will start by clicking on the only button of Giswater that we have available at the moment to open the following window:
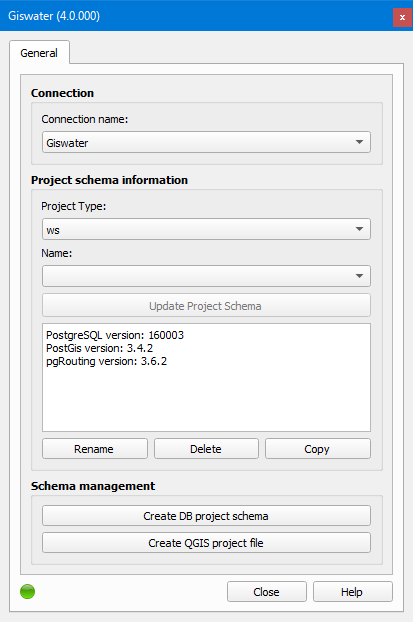
Figura 1 Giswater projects manager window.
Next, we will select what type of schema we want to create in the Project type dropdown (ws for supply or ud for sanitation) and click on the Create database project schema button to open the creation window:
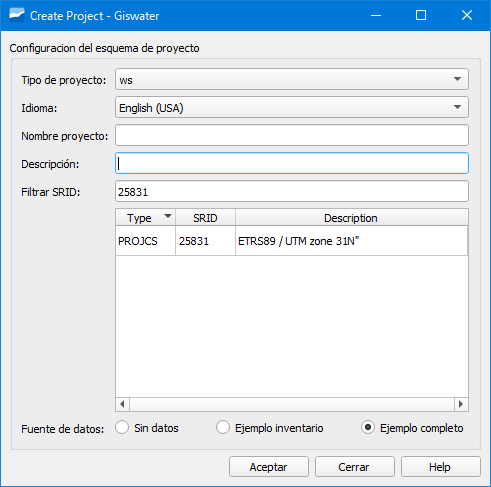
Figura 2 New schema creation window.
In the previous window we will have to specify:
Project type: type of project we are going to create (ws for supply or ud for sanitation).
Language: language in which the schema will be created. We can choose one of the available in the dropdown. If we are going to create one of the available examples (Example inventory or Example complete) we will have to select the English (USA) language.
Project name: we will indicate the name of the project schema. It cannot contain uppercase letters.
Description: brief description of the project.
Filter SRID: coordinate system of the zone where the schema will be created.
Data source: we have three options available:
No data: option selected to create a blank schema.
Example inventory: option selected to have an example schema only with inventory data.
Example complete: option selected to have an example schema with complete data (inventory and EPA).
After specifying the above, click on the Accept button to start the schema creation.
Importante
You need PostgreSQL superadministrator privileges to start working with Giswater. For example, to create a new database. Once the project has started, any type of user can work with Giswater as long as they have the appropriate role.
Creation of the QGIS project file
With the project schema created, the next step is to create the QGIS project. For this, in the projects manager window, click on the Create QGIS project file button. In the popup window we will specify the name of the QGIS project, the path where the project will be saved as well as we will have to mark or unmark the Export user password checkbox.
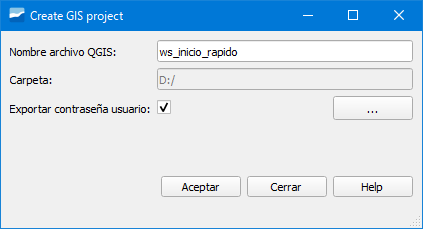
Figura 3 QGIS project creation window.
The QGIS project will load after being created and we can start working with Giswater.